Why Choose Rubber Trim Baseboard for Global Projects?
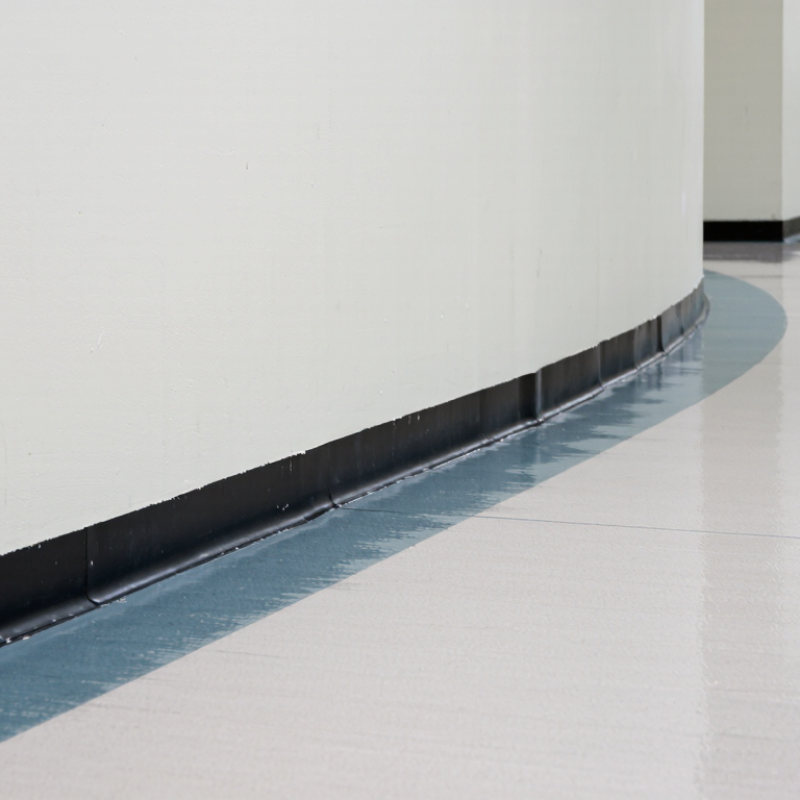
Global building projects demand details that survive shipment, installation, cleaning, and daily impact. Rubber Trim Baseboard can protect lower walls while creating a neat transition between resilient floors and painted surfaces. Its flexible profile can follow uneven corners, like a dark, continuous line around a busy hospital corridor.
Grand View Research reported that the global rubber flooring market was valued at approximately USD 1.7 billion in 2023. The same report forecasts steady growth through 2030, supported by healthcare, education, commercial, and industrial construction. ASTM F1861 also classifies resilient wall base products by material and performance requirements. These references matter because appearance alone cannot prove suitability.
Performance matters more.
John McGrath, a longtime resilient-flooring consultant, explains, “Wall base is a small product, but it carries a large share of daily protection.” That observation reflects practical conditions: rolling carts strike corners, mops leave moisture lines, and repeated cleaning can expose weak adhesives. A well-specified Rubber Trim Baseboard may reduce visible damage and simplify maintenance across different project locations.
However, rubber is not automatically the best choice. Climate, substrate moisture, fire requirements, adhesive compatibility, and local installation standards must be checked. Product data sheets should confirm dimensions, chemical resistance, VOC information, and temperature limits. I would not approve one profile for every country without testing it first. That assumption needs testing.
For global projects, the strongest choice combines documented performance, reliable supply, consistent color, and trained installation. A modest trim can protect expensive interiors.
Why Choose Rubber Trim Baseboard for Global Projects?
For global projects, rubber trim baseboard offers flexible protection around walls, floors, and exposed edges. Its value starts with the rubber compound, not only the visible profile. ASTM D2000 provides a structured method for classifying elastomers by type, grade, and performance requirements. EPDM commonly appears under Type AA, though the exact grade must match the project specification. That distinction matters.
EPDM grades are not interchangeable. The specification should identify hardness, tensile strength, elongation, heat resistance, and compression set. Ozone and weathering performance also deserve attention in outdoor or humid environments. A procurement team should compare test results with actual site conditions. Ask for batch records and laboratory data. Field conditions can expose gaps between a certificate and daily performance. It may sound obvious.
EPDM resists sunlight, ozone, moisture, and temperature changes better than many general-purpose rubbers. This makes it suitable for transportation hubs, commercial buildings, and industrial facilities. For baseboards, stable compression helps maintain contact against uneven surfaces. Installers should still check corner geometry, adhesive compatibility, and expansion allowances. One practical weakness is installation variation. Poorly prepared substrates can reduce adhesion, even with a well-selected grade. A careful engineer should review the ASTM D2000 designation alongside climate data, cleaning methods, and expected service life. No grade table can predict every site.
Why Choose Rubber Trim Baseboard for Global Projects?
Rubber trim baseboard offers practical resilience where walls meet floors. A 50–70 Shore A hardness range usually balances flexibility and surface stability. Softer grades can follow uneven floors more closely. Harder grades may resist dents near carts, doors, and busy corridors. ASTM D2240 provides the Shore hardness testing method. However, hardness alone cannot predict service life. Our first specification was too simple. We learned that temperature, compression, cleaning chemicals, and installation quality also matter.
ASTM D412 tensile testing measures tensile strength, elongation, and modulus under controlled conditions. These results help engineers compare batches and define project requirements. A trim with strong tensile performance may stretch during installation without tearing. Yet high tensile strength does not automatically mean better impact resistance. The testing report should identify specimen type, conditioning, test speed, and failure behavior. ASTM D412 itself does not set one universal pass-or-fail value. That detail is often overlooked in procurement documents. For global projects, repeat testing across production lots improves traceability and reduces installation surprises.
Tips: Specify the target hardness, tensile strength, elongation, and thickness together. Request ASTM D412 results from recent production samples. Check hardness at several points, not only one corner. Test a short installed section before approving the full shipment. Record substrate temperature and adhesive conditions. Real sites are rarely perfect, and laboratory data cannot capture every failure.
Why Choose Rubber Trim Baseboard for Global Projects?
Rubber trim baseboard suits projects that need flexible edges, impact resistance, and clean visual lines. Its installation, however, determines long-term performance. Before bonding, installers should inspect the wall and floor for dust, moisture, oil, and loose coatings. A dry, stable surface matters more than quick application. Adhesive should match the rubber material and substrate. Always follow the adhesive supplier’s coverage and curing guidance.
Apply adhesive in controlled beads or an even layer, depending on the product design. Press the baseboard firmly, especially along the upper and lower edges. A hand roller can remove small air pockets. Keep the trim aligned with a straightedge. Small gaps often appear when the wall is uneven. That is normal, but they should not be ignored. Allow sufficient curing time before cleaning or moving furniture.
Corners require careful forming rather than forceful bending. Warm the rubber only when the material instructions permit it. Make gradual cuts or relief points to prevent stress and open seams. At joints, place pieces tightly together and apply a compatible sealant where moisture protection is required. Wipe away excess sealant immediately. Test one corner first. It may reveal movement, poor adhesion, or an unsuitable finish before the full installation continues. For global projects, record surface conditions, installation temperatures, adhesive batches, and joint details. This simple record supports consistent workmanship across different sites.
| Installation Stage | Recommended Method | Typical Materials and Tools | Practical Installation Data | Quality-Control Check | Global Project Benefit |
|---|---|---|---|---|---|
| 1. Substrate Preparation | Clean, dry, and sound the wall and floor contact surfaces before bonding. | Neutral cleaner, lint-free cloth, scraper, sanding pad, moisture meter where required. | Remove dust, grease, loose paint, and laitance. Allow cleaning agents and substrates to dry completely before adhesive application. | The surface is visibly clean, flat, dry, and free from friable material; uneven areas are repaired before installation. | Improves adhesion reliability across concrete, plasterboard, masonry, and other common interior substrates. |
| 2. Adhesive Bonding | Apply a continuous compatible adhesive bead or suitable spread pattern to the rear of the rubber trim baseboard, then press firmly into position. | Compatible polymer, polyurethane, or contact adhesive; caulking gun or notched spreader; pressure roller; masking tape. | Follow the adhesive technical data sheet for open time, working time, coverage, and curing time. Maintain consistent contact pressure along the full length. | No visible voids, lifting edges, adhesive contamination, or movement under light hand pressure after initial set. | Adhesive bonding avoids extensive mechanical fixings and supports fast installation in renovation and new-build environments. |
| 3. Alignment and Pressure | Set the trim against a consistent datum line and roll or press from the center toward both ends. | Laser level or chalk line, hand roller, straightedge, spacers if needed. | Install in manageable lengths to prevent adhesive skinning and maintain a straight top edge. Remove temporary tape after the adhesive has stabilized. | Top edge is visually straight; the trim remains fully seated without buckling, stretching, or trapped air pockets. | A repeatable alignment process helps maintain consistent appearance across different installers and regions. |
| 4. Internal Corner Forming | Use a preformed internal corner where available, or make a controlled relief cut and form the trim without compressing the profile. | Sharp trimming knife, corner template, backing board, compatible adhesive, joint sealant if specified. | Avoid over-stretching. The minimum bend radius and cutting method must follow the profile geometry and material instructions. | Corner is tight and uniform, with no open gap, whitening, tearing, excessive compression, or exposed substrate. | Flexible rubber accommodates minor geometric variation and reduces the need for complex site fabrication. |
| 5. External Corner Forming | Form the corner with a preformed external piece or create accurately matched mitre cuts using a stable cutting guide. | Mitre guide, fine-tooth blade, measuring rule, compatible adhesive, color-matched sealant where required. | Cut ends square and clean. Dry-fit both sections before applying adhesive to verify the angle and profile continuity. | The external corner has a stable joint, aligned profile faces, and no sharp projection or visible adhesive residue. | Standardized corner procedures simplify training and reduce rework on multi-site projects. |
| 6. Sealed Joints | Butt-join straight lengths neatly and seal the joint with a compatible flexible sealant when hygiene, moisture resistance, or cleanability is required. | Compatible sealant, fine nozzle, jointing tool, masking tape, cleaning cloth. | Keep the joint narrow and uniform. Tool the sealant smoothly and remove masking tape before surface skin forms, following the sealant instructions. | Joint is continuous, smooth, fully filled, and free from pinholes, smearing, shrinkage, or separation from the trim. | Sealed joints help limit dirt and moisture accumulation at transitions and simplify routine cleaning. |
| 7. Curing and Handover | Protect the installation from impact, water, heavy cleaning, and displacement until the adhesive and sealant have cured. | Protection film or barriers, inspection checklist, soft cleaning tools. | Curing time depends on adhesive type, temperature, humidity, substrate porosity, and bond thickness; use the product technical data sheet. | Check adhesion, alignment, corners, joints, surface cleanliness, and damage before handover. | A documented inspection process supports consistent acceptance criteria across different climates and construction teams. |
| Technical note: Rubber trim baseboard installation conditions, adhesive selection, substrate moisture limits, working time, and curing time vary by material and site. Always verify compatibility and installation requirements with the applicable technical data sheets and project specifications. For areas exposed to frequent water, disinfectants, impact, or high hygiene requirements, specify a sealant and cleaning regime that are chemically compatible with the rubber profile and adjacent finishes. | |||||
Why Choose Rubber Trim Baseboard for Global Projects?
Global compliance starts with material control, not appearance. Rubber trim baseboard can protect wall edges in corridors, hospitals, schools, and transport facilities. It also handles repeated impacts from carts and cleaning equipment. That practical durability matters.
REACH requires careful screening for substances of very high concern. ECHA’s 2024 Candidate List contained 241 substances, showing how compliance can change over time. Suppliers should provide current declarations, composition data, and traceable test records. RoHS restricts ten substances, including lead, mercury, and certain flame retardants. These limits are especially important when projects cross European and Asian supply chains. A material declaration alone may not prove every finished profile is compliant.
Flame performance needs separate attention. ASTM E84 measures flame-spread and smoke-developed indexes under controlled tunnel conditions. Many building codes associate Class A with values of 25 or less for flame spread and 450 or less for smoke development. However, those results depend on thickness, backing, installation, and test preparation. A trim profile tested alone may perform differently after adhesive, substrate, and joint details are added. That is an easy point to miss. Request recent ASTM E84 reports, REACH statements, RoHS evidence, and production-batch identification. Then review the installation assembly with the local authority. Compliance paperwork is useful, but it is not the whole building.
Global project suitability depends on documented material compliance and regional fire-performance requirements. REACH and RoHS address restricted substances, while ASTM E84 evaluates surface burning behavior.
ASTM E84 classification reference: Class A = FSI 0–25, Class B = FSI 26–75, Class C = FSI 76–200. These thresholds are reference ranges, not proof that a specific product passes. Confirm current project specifications and obtain product-specific documentation.
Why Choose Rubber Trim Baseboard for Global Projects?
For global projects, rubber trim baseboard should be judged beyond purchase price. A 10–20-year service-life target changes the specification conversation. It directs attention toward impact resistance, edge retention, cleanability, and replacement access. In schools, clinics, offices, and transport facilities, walls face carts, shoes, mop water, and repeated contact. A resilient trim can absorb minor knocks without cracking like brittle materials. It also creates a continuous, washable transition between wall and floor. Small detail. Big consequence. Still, service life is a target, not a promise. UV exposure, moisture, chemicals, poor installation, and heavy traffic can shorten it.
Reliable planning starts with evidence. Request technical data, chemical-resistance guidance, installation instructions, and maintenance records suitable for the project climate. Check substrate condition before fitting. Uneven walls can leave gaps that collect dirt and stress the adhesive. Use compatible adhesives and allow proper curing time. Inspect exposed corners and high-traffic zones during scheduled maintenance. Early repairs usually cost less than replacing long runs. For international teams, standard details and clear inspection photographs improve consistency across sites. They also make future decisions easier. The 10–20-year target should be tested against local humidity, temperature swings, cleaning routines, and expected occupancy. A thoughtful specification may still admit uncertainty. Some surfaces will age faster, and appearance may decline before performance does. That distinction matters when budgeting renewal work and evaluating true lifecycle value.
It resists sunlight, ozone, moisture, and changing temperatures. It also protects wall and floor edges from daily contact. Performance still depends on the selected grade.
Specify hardness, tensile strength, elongation, thickness, heat resistance, and compression set. Include weathering requirements for outdoor or humid locations. One number is not enough.
A 50–70 Shore A range often balances flexibility and surface stability. Softer grades follow uneven floors more easily. Harder grades resist dents from carts and doors.
Use controlled tensile testing to measure strength, elongation, and modulus. Review the specimen type, conditioning, test speed, and failure behavior. Strong tensile results do not guarantee impact resistance.
Not completely. Site conditions can expose gaps between certificates and daily performance. Review humidity, temperature changes, cleaning chemicals, traffic, and substrate quality. An early specification may be too simple.
Many projects set a 10–20-year service-life target. This remains a planning goal, not a promise. Heavy traffic, ultraviolet exposure, moisture, or poor installation can shorten performance.
Check wall condition, corner geometry, adhesive compatibility, and expansion allowances. Clean and prepare the substrate before fitting. Allow the adhesive to cure properly. Uneven walls can create gaps and dirt traps.
Request recent production test results and batch records. Check hardness at several points, not one corner. Install a short trial section before approving the shipment. Record substrate temperature and adhesive conditions. Real sites are rarely perfect.
Rubber Trim Baseboard is a practical solution for global construction and renovation projects that require durability, flexibility, and consistent performance. Manufactured from EPDM rubber grades classified under ASTM D2000, it can be specified in hardness ranges of approximately 50–70 Shore A to balance comfort, resilience, and impact resistance. ASTM D412 tensile testing provides measurable data for evaluating strength and elongation, helping project teams select materials suited to different environmental conditions and installation requirements.
Installation typically involves adhesive bonding, accurate corner forming, and sealed joints to create a clean, continuous finish while reducing moisture and dirt intrusion. For international projects, compliance considerations may include REACH and RoHS requirements, along with ASTM E84 flame-spread testing where applicable. With proper material selection, surface preparation, and maintenance, Rubber Trim Baseboard can support service-life targets of 10–20 years, offering reliable lifecycle value and reducing the need for frequent replacement across diverse project environments.

101 Rubber